
Anyone with a contact form on their website has had to consider the issue of spam. A captcha field will stop some of the spam but can antagonise your potential customers. A honey trap is another option.
Having written a plugin for the WP Members plugin last week, I went on to look at one of our regular contact form plugins – WordPress Form Manager plugin written by Campbell Hoffman. I worked out that you can implement a honey trap without having to code. Below is the details of how to do it.
How does the honey trap work?
The honey trap works on the belief that spambots do not go as far as inspecting css (styling code). They will complete all the fields they see on the form. A real person will not see the field so cannot complete it.
A field is set up on the form and is then hidden through the styling of the page. When the form is submitted, the field is checked for data: if it is not empty, it is assumed that the visitor is a spambot.
If data is detected, a standard error message box will be displayed. In the event of a real person tripping the trap, it will ask for them to contact the site owner directly. This is unlikely as most people will not get as far as the form if the page is unstyled.
Create your own honey trap
These instructions are specific to WordPress Form Manager plugin written by Campbell Hoffman. The only other pre-requisite is that you are using a theme which will let you add custom css.
Set up the honey trap validation

Under the Form menu, select “Advanced Settings”.
Under the Text Validators table, click “Add”.
Fill in the new row:
- Name = “Empty”
- Error message = “There is a problem with the form. Please contact us directly.”
- Regular expression = ” /^$/” (without the quotes)
Scroll to the bottom of the page and click “Save Changes”.
Add the honey trap field
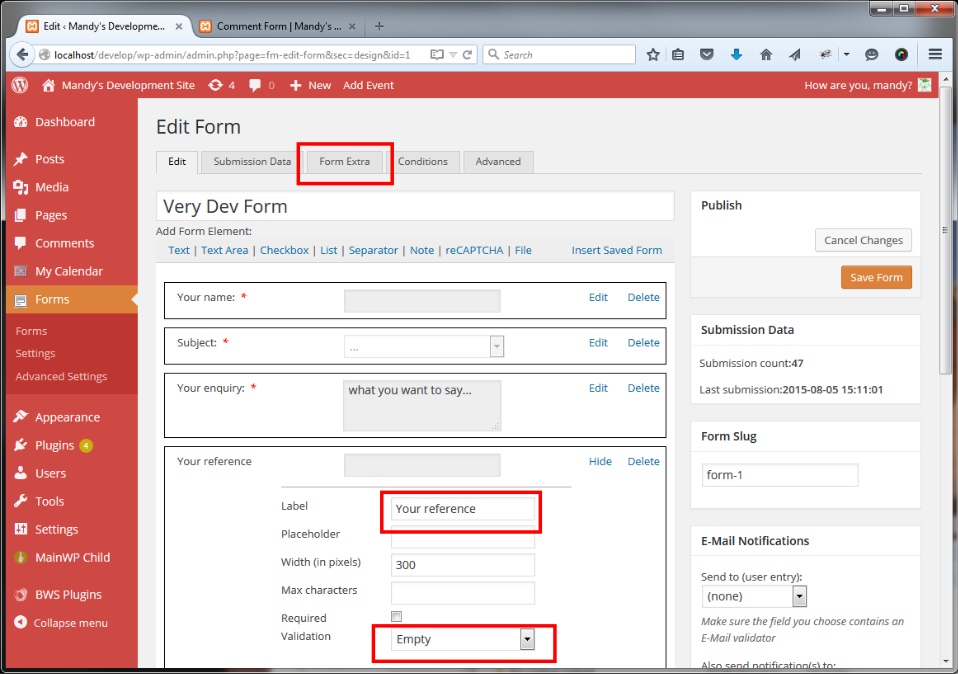
From the Forms list, edit the form required.
Add a “Text” form element.
Edit the field and provide a label. Make it vaguely appropriate to the form (so it does not stand out).
Select “Empty” as the validation. Do not check the Required field.
Save the form.
Click on the “Form Extra” tab on the Edit form page.
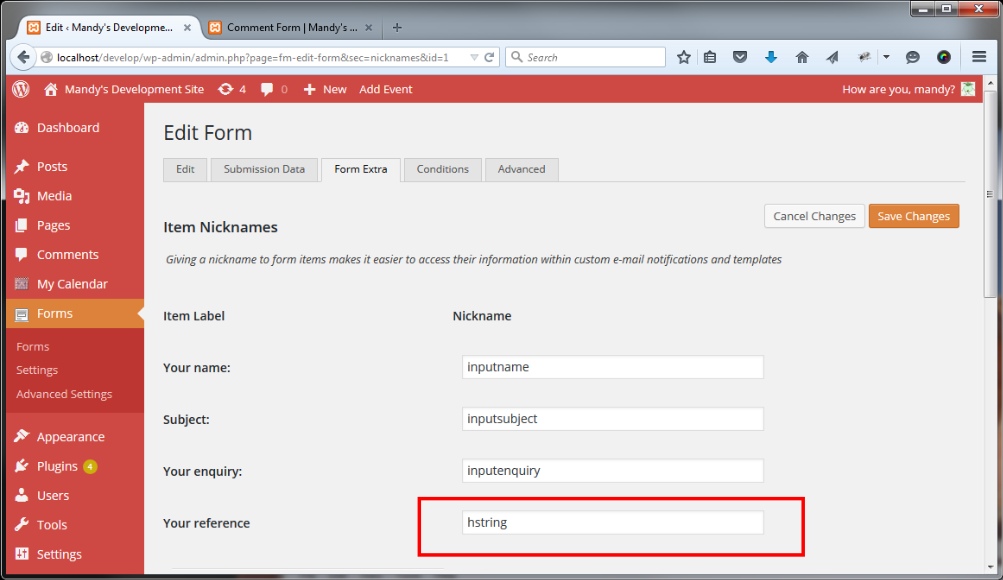
Against the label you have just created, provide a nickname e.g. “hstring” (alphanumeric, no spaces).
Save the changes.
Test your honeypot
Before you hide the field, visit your form and test it with and without text in the honeypot field.
If you fill in the field, you should get a message.
If you leave the field blank, you will be able to submit the form successfully.
Set the styling
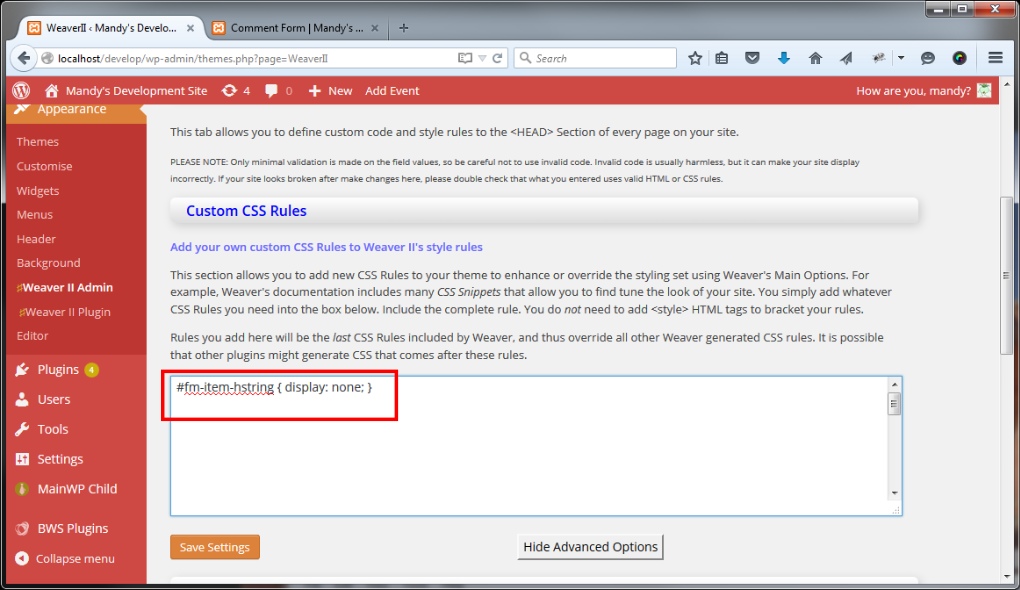
In your theme settings are, locate the field for custom css rules. Some themes will put it under an advanced or miscellaneous tab, others will have it on the general settings tab.
Add the rule to hide the field you just entered. For the field with a nickname of “hstring”, the rule will be:
#fm-item-hstring { display: none; }
Save your settings.
Visit your site to make sure your new field is hidden.
That’s it!
Now what?
We cannot guarantee that a honey trap will block all spam visits to your site. Spambots are getting more sophisticated all the time and companies may also employ people to send spam messages. It can however help to reduce the number of spam messages you receive.
The detail outlined above is specific to one plugin but the method can be used for others, dependent on the flexibility of the interface. Some contact forms will already have a honey trap hardcoded into them. We hope you can follow the instructions above, but if the thought of it is too much, please get in touch to find out how we can help you with this and any other WordPress problems.